Painting Frenzy

0 comments

I made a valiant attempt. 
I've shared with you my dilemma about painting furniture so I did everything I could think of in the dining room to lighten it up short of that.  
I painted the walls a gray that is pretty but it reads a little green for me. I'm not repainting them - yet.  
I painted all the picture frames. 
I made a white wood tray and set it on a table of white stuff.


I painted the lamps.
I filled the dish dresser with white dishes.


I came to the conclusion that a piece of furniture was going to have to be sacrificed to the paintbrush gods. 
The gods would not be denied!! 
I think you know what I mean. 
Sometimes a decorating problem just has to be fixed even if it goes against an unspoken principle. 


The likely candidate for the sacrifice was the $5.00 buffet that was just a little too orangey oak. It had a long 23 year run in my possession. 
All we had to do to this piece was fix a door, get new pulls and prop up the drawer now and again. 


I hoped that a lighter finish on the buffet would draw the eye in and bring out some pretty but subtle details. 


It wasn't an expensive piece in its day. It is made with veneer from the 20s or 30s.
I'm pretty sure it had been refinished by the time I got it. 
I hate to be the first one to alter a finish on furniture. 


It's also not un-reversable. I can always refinish it later when orange oak comes back in style… What? You don't think orange will be back in style anytime soon?
Nope! It won't. 


This buffet is probably my crowning garage sale achievement. $5.00!! 


We were in a new, bigger house when I found it but we were house poor. We needed stuff to fill up this place.


I have really enjoyed this piece over the years but it was time for a new look.
Now I won't just see a sea of the same color wood when I look into the room.
My dad's table will stand out a little more. 


I bought a brand new quart of CeCe Caldwell chalk paint in Vintage White the other day.
The temptation was too much to resist so I went a little crazy on this piece and two others. 
I'll be sharing those with you later. 
Katie   
Linking with,
The Charm of Home   
Funky Junk Interiors  
Feathered Nest Friday  
A Stroll Thru Life   
Coastal Charm   
Dwellings - The Heart of Your Home   
Savvy Southern Style

The Best Apple Pie

0 comments

I don't know if I have told you about my grandmother's pies. 


She was an amazing baker.

My favorite was her Lemon Meringue which I have never been able to replicate but 
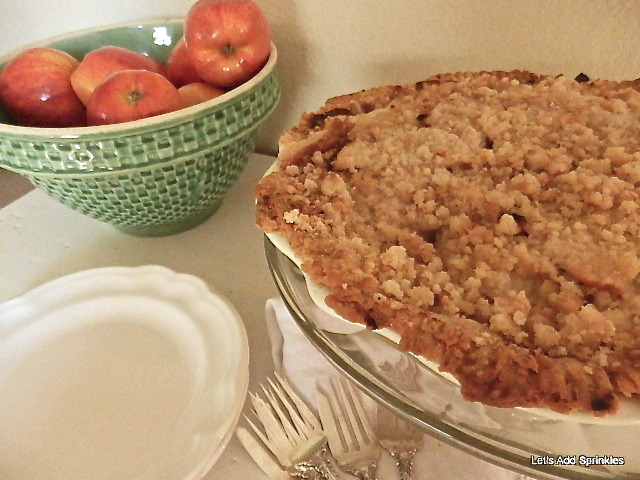
I have been able to copy her style of apple pie.


It is just perfect for this time of year.


I couldn't get any of her recipes because she didn't have any. She was a little of this and a little of that type of baker. 

I have tweaked this recipe over the years to get it just how we like it. 

The final version of it happened quite by accident. 


One Thanksgiving eve I was making the pie. 

It slipped off of the rack in the oven and half of the apples and most of the crumb topping fell off. 
I quickly grabbed more apples out of the fridge. They just happened to be Honey Crisp apples our favorite snacking apple at the time. 
I par boiled them so they would be at about the same level of doneness as the apples still in the pie. I made more crumb topping and stuck the pie back in the oven.
It was a hit and I have been making it that way ever since.


The Best Apple Pie
(Granny's Apple Pie)
Sprinkle your favorite 9 inch pie crust with 
Sugar In The Raw and prick with a fork. 


As you can see, I don't do anything fancy to the edge of my pie crusts.


Filling:
3 large Honey Crisp (or similar) apples 
4 medium Granny Smith apples
Peel, core and slice apples into pie the shell.
Cut up  and dot 2 Tablespoons  butter onto apples.
Sprinkle with 1/8 cup sugar.
and 1/2 tsp. cinnamon. 

In a bowl combine 

1 cup flour
1/2 cup brown sugar
1/2 white sugar
1/4 powdered sugar
1 tsp cinnamon
1/2 cup butter
Cut in the butter until mixture is crumbly 
The little crumbs should be about the size of a pea or smaller.
Bake at 400 for about 45 minutes.
Cover edges of the crust and bake about 
10 minutes more until apples are tender but not mushy.
I will slip one out under the crumb topping and test it.
Okay. 


Even though I added sugar, I think their sweetness mellows the tartness of the Granny Smiths.
Tart and Sweet at the same time.

I love a crumb topping on apple pie rather than a crusts topping. 


Give it a try for your next gathering.


Rest in Peace

0 comments
James Louis Lloyd
February 5, 1957 - November 18, 2013 

Never have the words "rest in peace" meant so much. 
Jim was my older brother by 2 years. 
We all felt the passing of our mom, but Jim never seemed to get over it. 
He wrestled with that pain off and on for years to great cost. 
Jim has been very sick for the past few years and today his body succumbed to cancer but he was finally reunited with our mom and dad. 
I believe he is up to his old tricks. He is displaying sarcasm and wit and he's once again his mischievous self. 
The painful effects of his life cannot be undone but I know that God does bring beauty from ashes and that there is beauty in his complete healing - physically, spiritually and emotionally. 
He is probably relaying to mom and dad all that they have missed with their children, grandchildren and great-grandchildren. 
"When we all get to heaven?" 
We will get on a bus and go to a Mets game.
We will fish in a reservoir.
We will go camping in the Catskills and we'll light the campfire with our dry wit.
We will all put on our red footy p.j.s and wait for Santa.
We'll climb into the stagecoach and ride into the sunset.
We will wear tennis shoes in Lake Sinissippi.
We'll have pork chops and applesauce for dinner.
"If I hear somebody say "moving forward" one more time they are going to get a Skilsaw to the head."
Oh Jim, I love you so.
 Love you forever.
Rest in Peace, brother, REST IN PEACE! 
Katie  

Banister Painted!

0 comments

I have never liked our banister - never.
 I remember thinking it was ugly the first time we toured the house.


We always planned on redoing it.
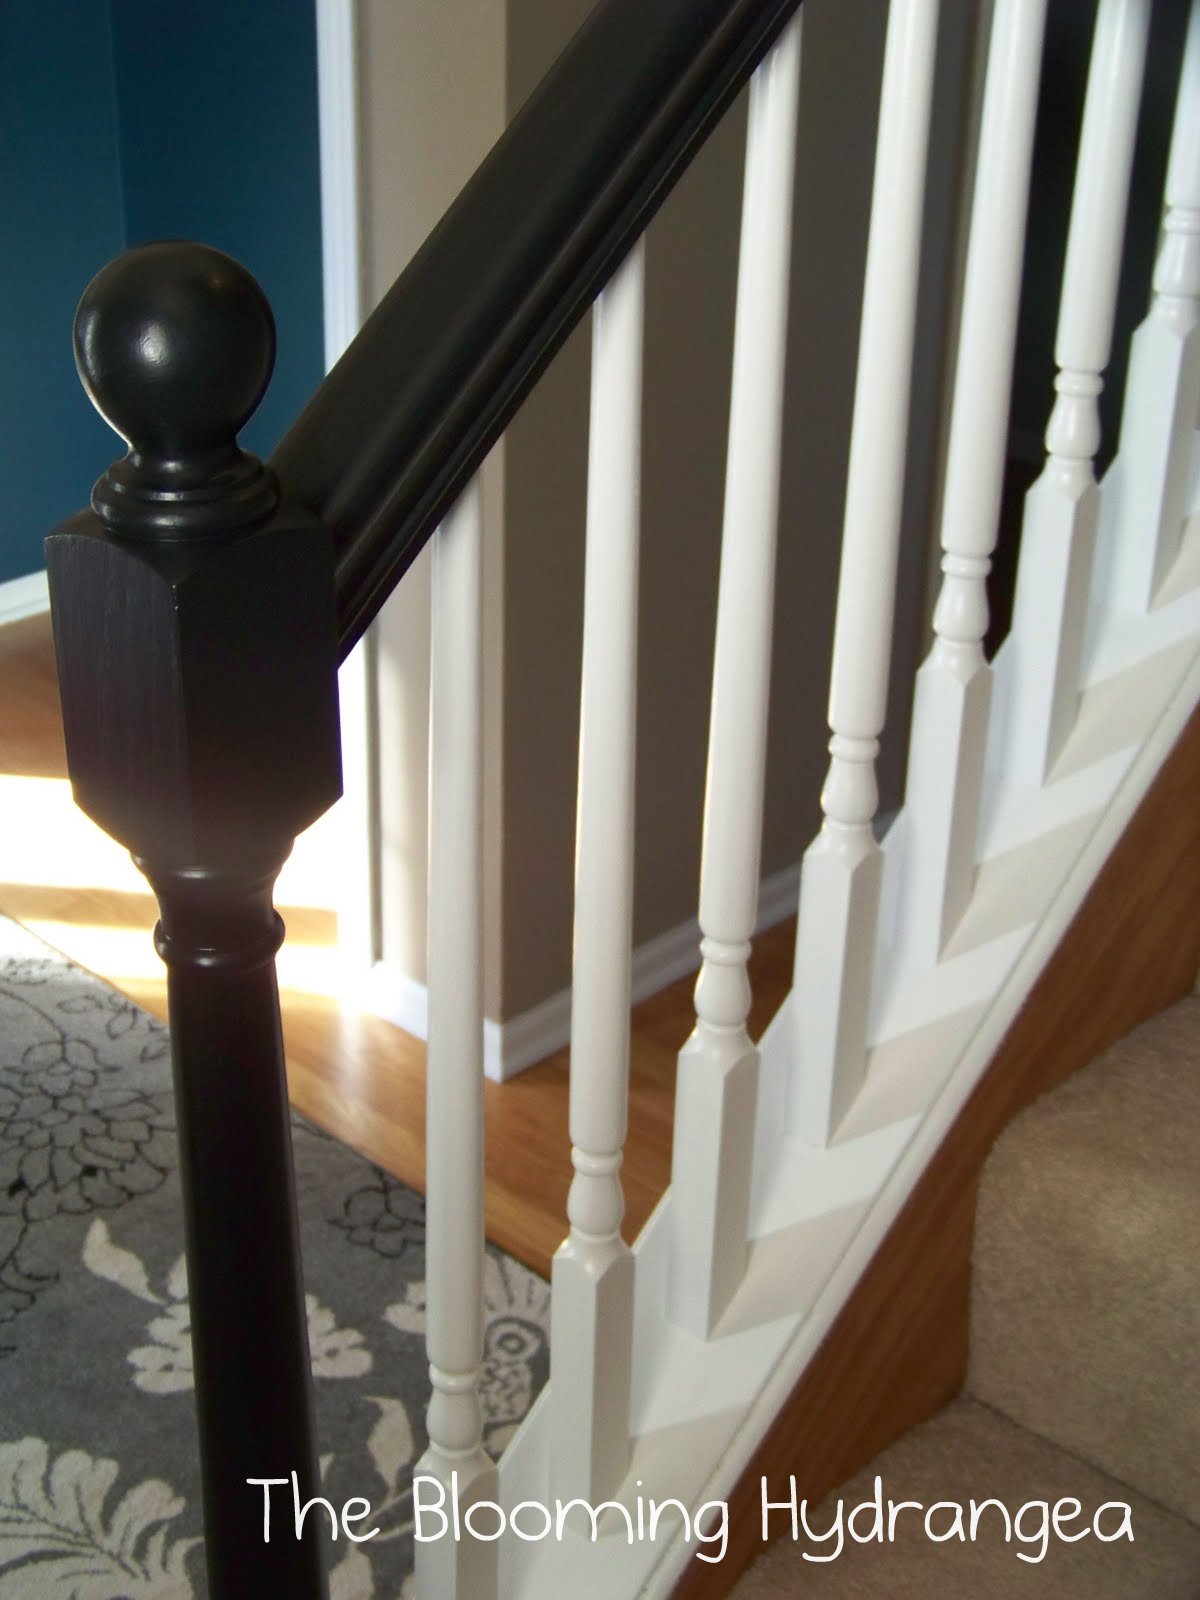
I wanted something like this.


Source: The Blooming Hydrangea

When those waned in favor, I wanted something like this.


Source: Pinterest
We never had the money for a redo.
Three kids, 5 cars, college....
The list could go on and on.
 I chose to ignore the banister. 
I flat out chose not to notice it anymore.
When I finished altering my mantel, I tried to figure out how I could add lumber to the newel posts.
I couldn't figure it out.
Ignore, ignore, ignore.
I thought about getting the carpenter out to see what he could do but other projects were more pressing.
Ignore, ignore, ignore.


I tried to make it darker with stain a few weeks ago but I could still see the orange when the sun moved to the back side of the house.
Ignore, ignore, ignore.


Source:Country Living

I've been thinking about Christmas and looking at Pinterest.
I started seeing all these wonderful banisters dripping with swags of garland.
They were white!


I also noticed that many of then had clean lines and were very linear-like mine.


Even though I knew this would be a job, I decided to bite the bullet and go for it.


It was as bad as I thought. Getting in all the nooks was tedious. I had to look at it from all different angles to make sure I got it all. Just when I thought I got it all, I would see a spot I missed. What a bizarre way to build a banister but
Bill says it was cheaper to build it this way.


The color is Sherwin Williams, White Duck in a Satin Oil Base Enamel.


It looks cottage instead of Craftsman or 80s Mission Revival. Yeah!


I love it.


I don't have to ignore, ignore, ignore!


Are you wondering why I didn't do this to begin with?
I'll tell you.
About 15 years ago our neighbors painted their cabinets and banister white. 
I didn't like it in their space because it looked cold.
But they had white tile floors, white walls, red leather sofas and a red brick hearth. I don't even think they had window treatments.  
There was no warmth or softness in the space. 
I was left with such a negative impression that for years I wouldn't even consider painting ours.

It is a relief to have this project behind me except for the little bit upstairs.


I can't wait to decorate it for Christmas.
Katie
P.S. Don't pin the images that I sourced from Pinterest. 
You can find them on my Stellar Stairs Board. Repin from there, please.   
Linking with, 
Funky Junk Interiors 
Between Naps on the Porch   
A Stroll Thru Life  
Lavender Garden Cottage   
Savvy Southern Style   
French Country Cottage

Faux Greenery and Flowers

0 comments

 My sister busted me about a former favorite of mine. 
I had a plethora of faux greenery and flowers.
If you are old enough to remember the 90s, you have to remember faux greenery. 
Everybody had it. 
We had it draped everywhere.
Homemakers had it dripping over bookshelves, picture frames and over the top of the kitchen cabinets. 


I had faux greenery draped, swathed and adorning almost every surface. It was a terrible idea. 
Most of the time it was a dusty, greasy mess.
(Do you say greasy or greazy? Bill says greasy and I say greasy. )
It was even worse with plastic grapes woven in and out.
  My sister pointed out that she doesn't "do" fake flowers or greens ever!
She makes do with pine cones, fresh fruit or flowers, antlers, sea shells and other items that are apropos to the season.
I started to wonder if it was possible to live and decorate without needing a Hobby Lobby floral department fix every now and again.
 I can't say I've been 100 percent successful but I have made progress and I'm in fake floral rehab.
Here are a couple of ways I added the real and nixed the plastic without having a stark environment. 


Lliriope or Monkey grass in a glass jar can be tucked in another container. It lasts about a month. I've got an abundance of this stuff in the yard. Ivy or clippings from shrubs would work as well.
My yard won't miss a thing.
Philodendron is by far the easiest house plant to grow. 
Even I can't kill it.


I trim the vines and re-root them in a vase. I've been doing this groovy thing since the 70s. 
I have even passed the technique onto my offspring. 

The other way I have added color without the silk is with dried flowers. Status is wonderful. It is cheap and it lasts for months.


I ordered these hydrangeas last year from Oregon. I got a big box for $25.00. They still look great a year later.


I love baby's breath. It also lasts a while and is very inexpensive. I found some at Kroger for $3.99 a bunch.


Hobby Lobby and Michaels have a great dried section. I have even gotten feathers to add to arrangements. 
Of course roses from the grocery store are wonderful too. I just turn them upside down to dry. 


Once they are dry they can be used in different arrangements.


I do use faux fruit. I really don't want the family eating my displays all the time. 
So what are my exceptions?
I do have a few bunches of fake flowers.
I like the ones that are made of velvet or velveteen.


Most of my fake ones are from a local wholesale company, Raz Imports. 
I use them in small doses and only as they are blooming in nature. Pansies when they are blooming outside, etc.


My favorite artificial would have to be vintage milner flowers. 
This one is off of one of my grandmother's flapper dresses. 
Love!
If you go with the faux, there are some good quality fakes out there.
I still have a plethora of fake Christmas greens. 
I went with more real last year than I ever have but it sheds so bad and I had to get new greens mid-month. 
What about you? Faux or No?  
Katie 


Copyright © Moviehole-katietreasures Blogger Theme by BloggerThemes & newwpthemes Sponsored by Internet Entrepreneur